Image through Scanline Graduation work This program was the work that I and my friend Edson Bacin did for the graduation course. The objective is to generate photo-realistic images from polygonal meshes. The program was developed for the Solaris platform, but we also adapted it to the Windows platform. It consisted of an executable SL.EXE that reads a scene description file (extension .CEN) and generates an image file SAIDA.RGB. This file has color values of red, green and blue for each pixel. In the directory "bin" there are two batch files already prepared for the creation of two scenes: one of a room (geraSala.bat) and the one of a jet plane (geraX29.bat). There is also an executable file WIRE.EXE that allows the visualization of a bye showing the edges of the polygons. The same way, three is another batch file (wireSala.bat)that presents the room scene. Preparing the environment To execute the programs it is necessary the follow these steps: Install the emulation program DOSBox v0.70. Modify the dosbox.conf file by putting machine=vga and cycles=auto. Expand the file below (1993-12S.zip) in the root of the disk C:\. The directory "c:\1993-12S" will be created containing the executable files, source codes, scene description and a visualization tool written in Java. Execute DOSBox and enter the command "mount c C: \ ". You can ignore the alert message that appears. Go to disk C by using the command "C:". Go to the directory of the executables by issuing "CD C:\1993-12S\bin". Generating the room scene or the jet plane scene 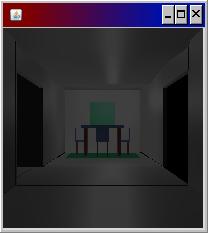 | | Picture: Visualization of the room scene. | After executing the steps above you can generated the room scene by following steps: Execute the batch file "geraSala.bat" (for the room scene) or "geraX29.bat" (for the jet plane scene). Run one of the two files through the DOSBox window. The batch file will execute the SL.EXE by passing the corresponding scene file. As a result an image file SAIDA.RGB of size 200 by 200 pixels will be generated. I created a small program in Java to visualize the scene file. This program opens the SAIDA.RGB file and display the content in a window. To execute this program opens the Windows Explorer and click twice over the file C:\1993-12S\bin\Image.jar. This program not only show the scene but also converts it to the JPG format by generating the file Saida.jpg. It is necessary that have the Java virtual machine installed. The Java VM should be at least version 1.4. To visualize the polygonal mesh 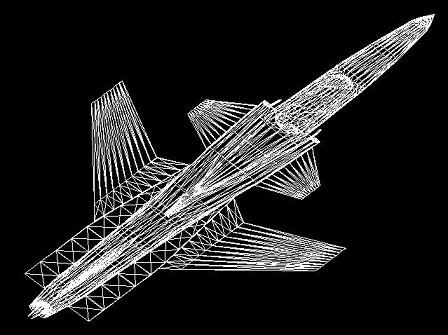 | | Picture: Polygonal mesh | To visualize the polygonal mesh you can call "wireSala.bat" (for room scene) or "wireX29.bat" (for the jet airplane scene). You should run it from the DOSBox window. After the image appears you can be press any key from the numeric keyboard. It will rotate, approximate and move the polygonal mesh. The program stops executing when the space bar is pressed. To visualize the lamp animation 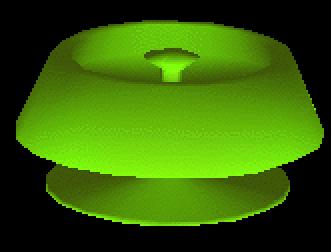 | | Picture: Lamp image | | Download Image through Scanline | | Name | Image through Scanline | | Implemented on | 1993/12 | | Size | 774Kb | | Executable and source code | 1993-12S.zip | Language and compiler | C compiler from Solaris platform | | |